

This past school year, I took the plunge. For a long time I'd been investigating the good, the bad, and the ugly of using interactive notebooks in the classroom. (No need to jump heedlessly on the proverbial bandwagon only to find quickly thereafter that it has no wheels.) After a time, my diligent research convinced me that the implementation of such tools helps students stay actively engaged in the learning process and aids in student ownership of ideas. When I accepted a new position teaching only two subjects (insert YIPPEEEEEEE!), it seemed like the perfect opportunity to put my newfound knowledge to good use. So...I did. In August of 2016, I finally decided to bite the bullet and use interactive notebooks in my fifth-grade math and science classes. May I just say...yay?!?
In all honesty, the interactive notebooks and I got off to a rocky start. (There may or may not have been a few ugly episodes during which I cursed the book's original creator and wondered why on earth I was putting myself and my students through this.) While there is a massive amount of information "out there" on setting up and using interactive notebooks--and I greatly appreciated everything I read--experience really is the very best teacher when it comes to things like this. More than anything else, you just have to figure out (frequently by trial and error) what works best for you and your students. And, while I definitely still am not the Rain Man of interactive notebooks, I do feel much less inclined at this point to hurl them angrily across the classroom. #progress
Following are a few of my must-haves in regards to using interactive notebooks effectively in the classroom.
1. Notebook Cover
Don't get me wrong--my students are AWESOME. They are "MY kids" from the moment their names go on my roster, and I am constantly impressed by their achievements. They're intelligent, gifted, talented, precious people, and some days I pinch myself to make sure that I'm not dreaming. Be that as it may, they're still...kids. So, naturally, actually READING the label they adhered to the lower right-hand corner of their notebooks at the beginning of the year, then subsequently identified in pen as "Sally's SCIENCE Interactive Notebook" is just too complicated a task to handle. Even storing them in a cubby completely separate from their labeled math interactive notebooks just didn't always help with their identification. 😖 It was my fault really. The bright white 2" x 3" label was just too small. Or something. My bad. In my never-ending quest to make their notebooks easier to identify at a moment's notice (AND keep them looking nice throughout the year), I now require that they affix the cover below to the front of their notebooks, write their name in the space provided, then cover them with clear masking tape (let's be real--I do this part). It cuts down a lot on the wear-and-tear that naturally occurs, and it looks good to boot! Since my class sizes are small, I usually print color copies for the front covers because they're just so darn pretty. But I also have the same covers in grayscale and in black-and-white should I ever decide to go that route. (You can find the entire science packet in my TpT store here. Also available are interactive notebook cover resources for ELA, Math, U.S. History, and World History. )
I predict that the wrong interactive notebook now will be brought to desks a solid 25% less!


2. Grading Rubric
Rubrics--you've gotta love them. Without these handy-dandy tools, it'd be much more difficult to bridge the gap between the three VERY different definitions of "excellent work" often held by teachers, students, and students' parents. To move us one step closer toward achieving world peace, I have my students tape the grading rubric shown below inside the front cover of their notebooks, providing a permanent, ready reference for notebook requirements and scoring expectations. Gandhi, who?


3. Table of Contents
I am in awe of anyone, literally ANYONE, who can get the most out of interactive notebooks without including in said notebook an organized table of contents. Many teachers simply have their students turn to the first page in their notebooks and make their own, adding entries to the next available line as needed. This method seems to work for a lot of people. More power to you.
While casual observers often marvel at the amount of freedom I give my students in terms of seating, snacks while working, etc., what they don't realize is that everything they see is the result of a carefully orchestrated classroom that runs on procedures, procedures, procedures, and ORGANIZATION. (It's fairly common knowledge in my neck of the woods that I nurse a married-woman crush on Harry Wong.) But I digress. When it comes to my table of contents, I absolutely must have something more organized than a piece of notebook paper on which a student may or may not have titled it, correctly divided it into sections, skipped lines even after being told and shown NOT to skip lines, listed the page numbers beside the correct entry title (yep, this was modeled, also), yada, yada. I never would have thought it possible before experiencing it, but apparently there is too much "scope for imagination" in the student creation of a table of contents, so for the sake of my sanity, I provide a blank table of contents like the one shown below. Students stack, then staple, the needed number of pages on the first page of their interactive notebooks. By going this route, students need only add entry titles to the already-designated spaces. Less "scope for the imagination," true, but I pull fewer hairs out of my head this way. #winning

4. Page Numbers on EVERY Page
Did I mention that my kids are awesome? Because they are. They are AWESOME. But--oh my giddy aunt--how hard is it to find page 102 between pages 101 and 103??? Clearly, this is a more difficult task than I had realized to this point. Having my students number every page in their interactive notebooks is somewhat time-consuming, but trust me, friends--the rewards far exceed the sacrifices.
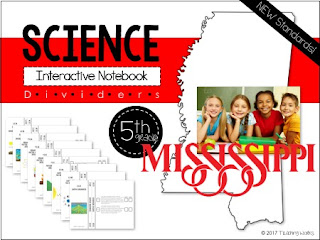
5. Content/Skill Dividers
If you haven't caught on to this fact by now, allow me to put it in black-and-white for you: for me, organization is LIFE. It's paramount to my effectiveness as a teacher. So when I implemented the use of interactive notebooks in my classroom, I struggled with the page-to-page method of creating entries that so many teachers find successful. I applaud their bravery. It just didn't work for me or my kiddos. Adding dividers for each concept or skill set was just what we needed. Below are a few examples of the dividers my students use in their science interactive notebooks. They are categorized by LIFE, PHYSICAL, and EARTH and SPACE SCIENCE. I labeled each divider with the fifth-grade science standards and included spaces for students to write their grades for two assessments given for each standard. All the #hearteyes for these dividers and their diligent contribution to my sanity! (If you teach fifth-grade science in Mississippi, you can access dividers for the 2010 MS Science Frameworks here and for the NEW Mississippi College and Career Readiness Science Standards here.)


Interactive notebooks and I have come a long way in our relationship, and I no longer regard them with a jaundiced eye. Their presence in my classroom has affected all the change I hoped for and more. Whether you're new to interactive notebooks or a seasoned pro, check out my science, math, language arts, social studies (U.S. History), and social studies (World History) packs available in my TpT store! I think you'll love them as much as my students and I do!
Until!


No comments